Build personal website with HUGO
Create a beautifully simple personal website in under 10 minutes
 Image credit: Unsplash
This article offers a sample guide of setting up personal website with HUGO and publishing it with GitHub Pages in macOS.
Nowadays, people are showing the great things they are building by publishing websites. Instead of making website from raw HTML and CSS, we can use Static site generators, like Jekyll, Octopress, Pelican, Middleman, and Hugo. I picked Hugo to build my blog. Codes for this website are shared in my github
Hugo site creation
The following content refered to
[1] https://themes.gohugo.io/anatole/
[2] https://gohugo.io/getting-started/quick-start/
[3] https://wowchemy.com/docs/install-locally/#install-with-git
Step 1: Install Hugo
For MacOS users, it’s recommended to do it through homebrew, just like for most open-source software.
brew install hugo
Step 2: Create new site
The following will create a new Hugo site in a folder named “filenam” under root directory. Default root directory for MacOS will be /Users/yourID. All the file required to finish the website would be in this folder.
hugo new site filename
Step 3: Construct a theme
One of the adcantages of Hugo is that it contains many nice themes, see themes.gohugo.io. I picked Academic.
A standard way for this part is
cd filename
git init
git submodule add https://github.com/lxndrblz/anatole.git themes/anatole
Then, create site configuration:
echo 'theme = "academic"' >> config.toml
With this code, config.toml would contain basic information for the website. Then you can edit config.toml with text editor.I would recommend Sublime Text.
Actually, one easy way to do this is to download the theme from GitHub directly and then customize it!
git clone https://github.com/wowchemy/starter-academic.git
git submodule update --init --recursive
For a beginer, I suggest copying the demo config.toml of the theme. Then we can modify parameters correspondingly. Documentation of each theme would always discuss the parameters in details.
Step 4: Post new blog
Now we would be able to add new post to our blog. For example, we can create brand-new post.
hugo new posts/my-first-post.md
For me, I downloaded the example content files of the them. These files gave me a quick insight of the post format. Then I would be able to modity the content e.g. adding images, paragraphs,and codeboxes.
Step 5: Run the Hugo server
With this code, you can see your new site at http://localhost:1313/.
hugo server -D
Website Publication with GitHub Pages
GitHub Pages provides really convenience method to publish personal website. There is no need to configure server and set up database.
1: Create a repository
Create a new repository named username.github.io, where username must be your username on GitHub. Then clone the new repository in the folder you would like to store this project.
git clone https://github.com/username/username.github.io
2: Deploy Hugo site
- GitHub Pages can not actually recognize the file format of hugo. Therefore, we would need to generate HTML files that can be read by Github for Hugo site. To do this, we firstly need to open config.toml and make the following modification:
baseURL = "https://mokszekei.github.io/" languageCode = "en" DefaultContentLanguage = "en" title = "Website of Siqi Mo" theme = "anatole" summarylength = 10 enableEmoji = true enableRobotsTXT = true publishDir = "mokszekei.github.io" - Now, Hugo know it need to output our HTML files to <github_username>.github.io. Go to the directory of your Hugo project, run the following command:
hugo
- Then Hugo will generate the HTML which customize the content in your site. All of these html, css files would be in
publicfolder. The next step we can do is copying and pasting files insidepublicto the GitHub repository. And then, post it.
git add .
git commit -m "host my website"
git push origin master
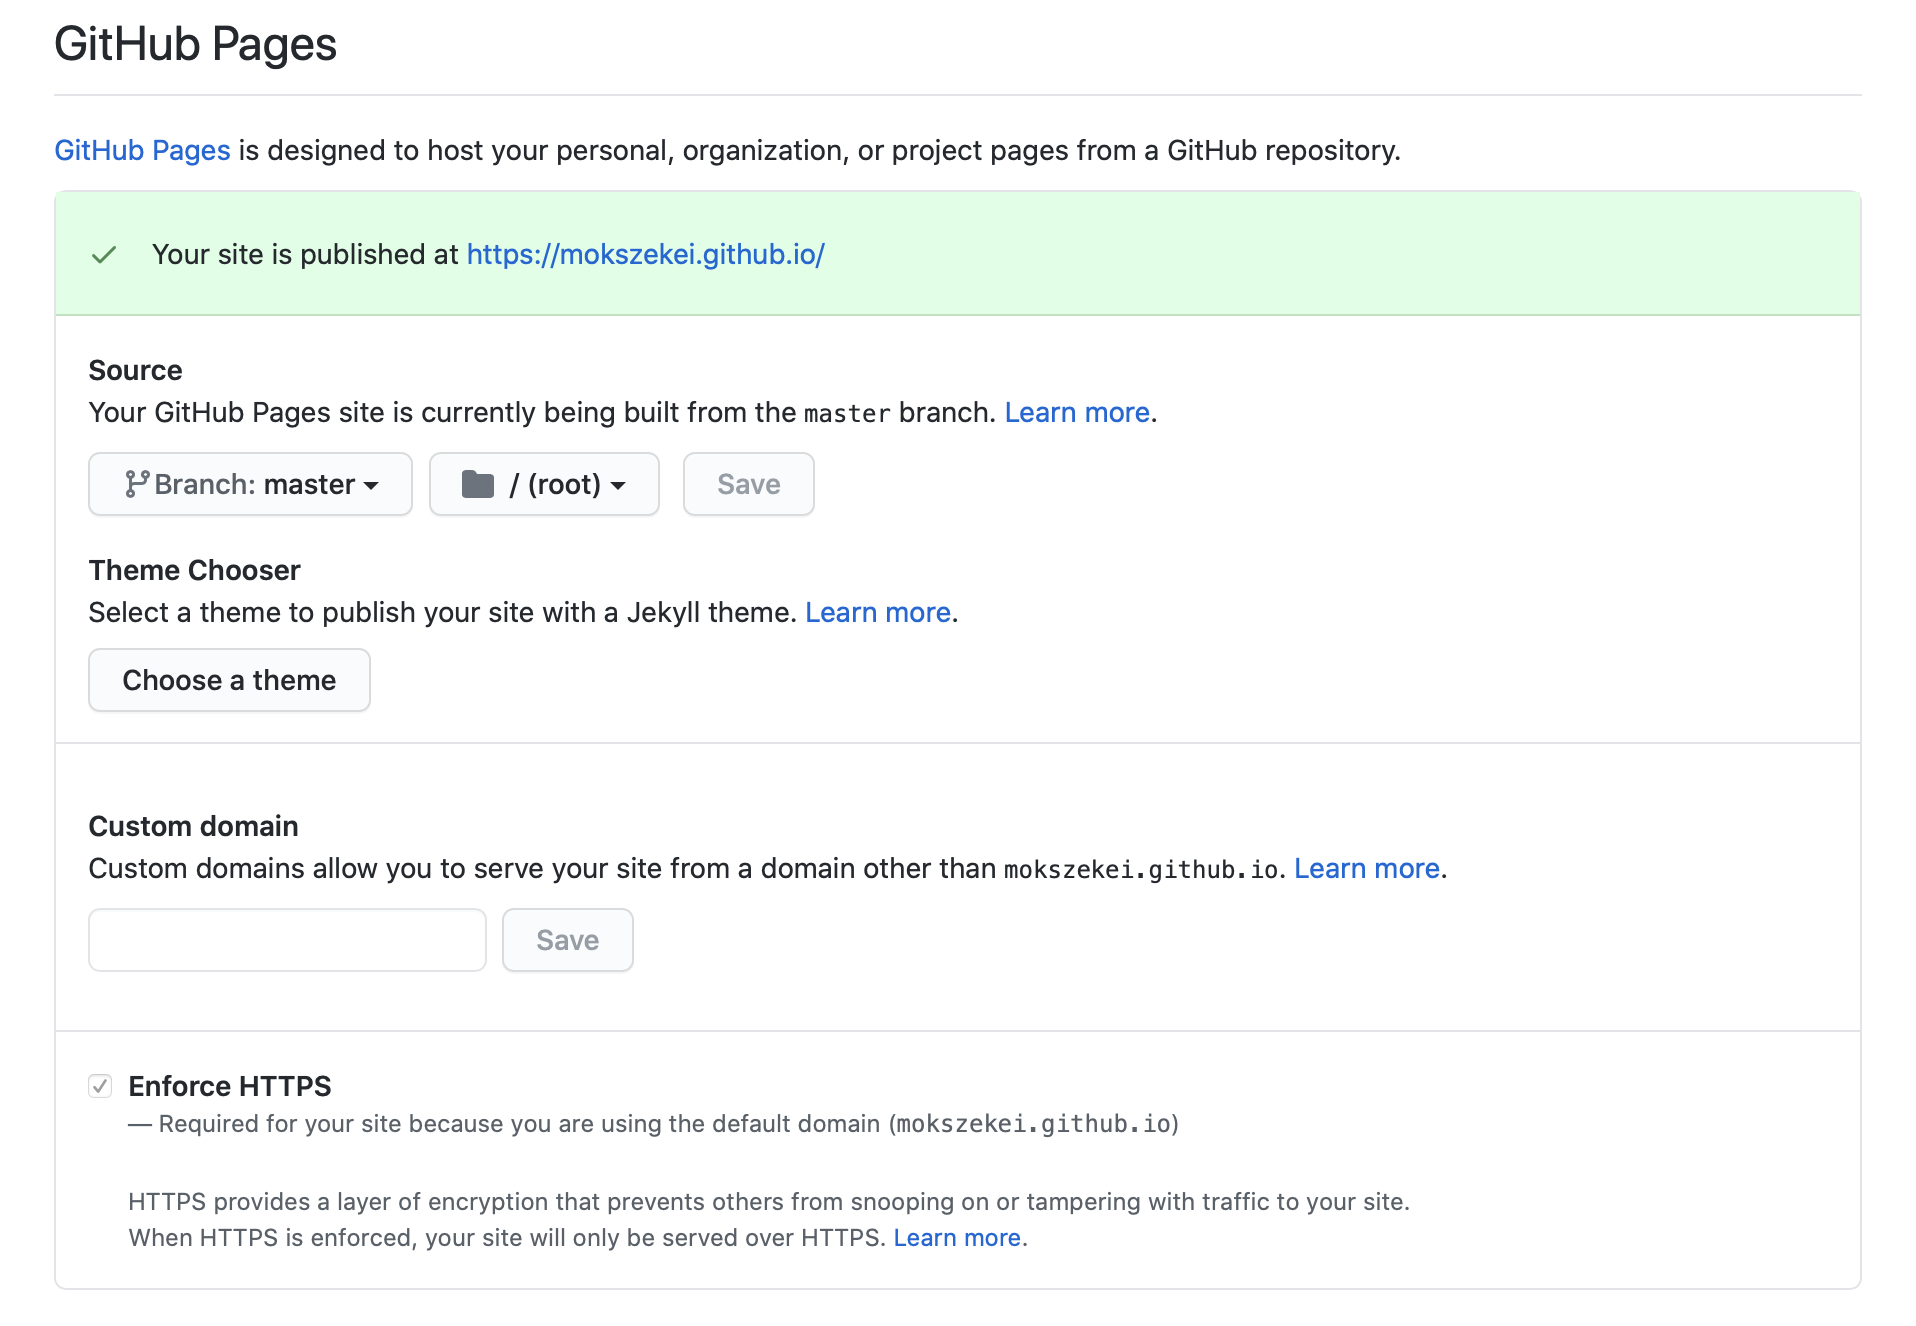
Done! You shoud be able to view your website https://username.github.io. You can also go to the github repository, press setting and roll down to Github Pages to see whether your website is successfully published.
Siqi Mo
Student in Duke University
I am a highly self-motivated learner who has a huge passion toward data.